Personal Training in Toronto Archery Lessons in Toronto Boxing Lessons in Toronto Ice Skating Lessons in Toronto Swimming Lessons in Toronto
Sign up for personal training / sports training by emailing cardiotrek@gmail.com.
Showing posts with label Unusual Exercises. Show all posts

Bedridden Exercises

Depending upon your circumstances you might someday find yourself bedridden due to one of the following reasons:

  • You might be elderly.
  • You might be recovering from surgery.
  • You might have a chronic illness.
  • You might have a severe injury.
  • You might require palliative care.
  • You might have a disability.

For whatever the reason, in such circumstances you may be looking for exercises that you can do in bed so that your muscles don't atrophy and so you can remain mobile and healthy once you are no longer bedridden. Some people may also keep dumbbells or similar exercise equipment next to their bed for the purpose of exercising, but let's assume that you don't have anything like that handy.

Therefore the following list of exercises was made for people in such circumstances:

  1. Leg lifts: Lift one leg at a time, hold for a few seconds, and then lower it back down. Repeat with the other leg.
  2. Ankle circles: Rotate each ankle clockwise and then counterclockwise to promote circulation and flexibility.
  3. Knee bends: Gently bend and straighten each knee, holding for a few seconds in the bent position.
  4. Arm raises: Lift each arm slowly towards the ceiling and then lower it back down.
  5. Hand squeezes: Squeeze a soft ball or rolled-up towel (or a blanket / pillow) with your hands, hold for a few seconds, and then release.
  6. Neck stretches: Gently tilt your head to one side, hold for a few seconds, and then switch to the other side.
  7. Shoulder shrugs: Raise both shoulders towards your ears, hold for a few seconds, and then relax.
  8. Abdominal contractions: Tighten your abdominal muscles as if trying to bring your belly button towards your spine, hold for a few seconds, and then relax.
  9. Deep breathing exercises: Inhale deeply through your nose, hold for a few seconds, and then exhale slowly through your mouth.
  10. Pelvic tilts: Tighten your abdominal muscles and gently tilt your pelvis upward, hold for a few seconds, and then relax.

Notes

Obviously don't do any of the knee exercises if you have a knee injury, for example. If you know you have a problem area, skip any exercises that puts too much strain on that body part.

If any of the exercises hurt then don't do them. This isn't a "no pain, no gain" situation. It is better to err on the side of caution here.

The goal here is to improve circulation, maintain muscle strength, and prevent stiffness.

If you are concerned about any of these exercises and whether they are safe I recommend consulting a physician first and see which exercises that they agree are best suited to your situation. They may also be able to suggest a physical therapist who can provide additional exercises that are suitable.

Javelin as a Sport, Part 2

Back in June a father asked me about getting javelin lessons for his son, which is not one of the sports that I specialize in. I did write about the topic however back in 2016. See Javelin as a Sport.

Here's the response I gave him:

Hello!


That is not one of the sports I specialize in, but I do remember writing an article with a personal anecdote on the subject.

I recommend going to some track and field events where javelin is one of the sports featured and try talking to any coaches there about the possibility of lessons.

Otherwise there are YouTube videos on the subject and you could purchase javelins for him to practice with and find a safe place (possibly a football or soccer field) to practice.

If you're unable to find anyone else to help him I am still a sports trainer and can assist in his training, but I still recommend finding someone who specializes in teaching javelin.

Have a great day!

Sincerely,
Charles Moffat
CardioTrek.ca

After the father thanked me it occurred to me that there was one tool at my fingertips that could also provide a good answer, so I went to ChatGPT and asked the following question:

What are the best ways to learn how to do Javelin as a sport?

And here was the response:

If you're interested in learning how to do javelin as a sport, there are several effective ways to get started and improve your skills. Here are some steps you can take:

  1. Find a coach or join a club: Look for local athletic clubs or organizations that offer javelin training. Having a qualified coach can make a significant difference in your learning process, as they can provide guidance, correct your technique, and help you progress.

  2. Study proper technique: Javelin throwing involves a specific set of techniques and skills. Familiarize yourself with the fundamentals by studying instructional videos, books, or online resources. Pay attention to grip, approach, body positioning, and the throwing motion.

  3. Warm up and stretch: Like any physical activity, warming up before throwing javelin is crucial. Perform dynamic stretches and mobility exercises to prepare your muscles and joints for the activity.

  4. Start with basic drills: Begin with drills that focus on individual aspects of the throw, such as footwork, arm movement, and balance. These drills will help you develop muscle memory and refine your technique.

  5. Work on strength and conditioning: Javelin throwing requires power, speed, and explosiveness. Incorporate strength and conditioning exercises into your training routine to improve your overall athletic performance. Focus on exercises that target the core, shoulders, legs, and hips.

  6. Practice regularly: Consistency is key when learning any sport. Set aside regular practice sessions to work on your technique, drills, and conditioning. Gradually increase the intensity and duration of your training as you progress.

  7. Attend workshops and camps: Look for workshops, clinics, or camps specifically focused on javelin throwing. These events often feature experienced coaches and athletes who can provide valuable insights, feedback, and specialized training.

  8. Participate in competitions: Once you've developed a solid foundation and feel confident in your abilities, consider entering local or regional javelin competitions. Competing will give you valuable experience, expose you to different conditions, and help you gauge your progress.

  9. Seek feedback and analyze performance: Ask your coach or fellow athletes to provide feedback on your technique. Recording and reviewing your throws can also help you identify areas for improvement and track your progress over time.

  10. Stay motivated and set goals: Javelin throwing requires dedication and perseverance. Set short-term and long-term goals to keep yourself motivated and focused on improving. Celebrate your achievements along the way, and remember that progress takes time.

Remember to prioritize safety throughout your training, and if you have any pre-existing health conditions or concerns, consult with a medical professional before engaging in any vigorous physical activity.


I then emailed the AI's response to the father. Answers like that make me realize that certain professions are doomed to be replaced by AI.


A Guide to Zen Exercising

Zen Exercising is a holistic approach to fitness that combines physical activity with mindfulness and mental well-being. It integrates principles from Zen Buddhism, such as presence, focus, and self-awareness, into various exercise routines. The goal of Zen Exercising is not just to improve physical fitness but also to cultivate a calm and centered state of mind.

Here are some exercises that fall into the category of Zen Exercising:

Tai Chi: This ancient Chinese martial art form combines slow and graceful movements with deep breathing and focused attention. It promotes balance, flexibility, and relaxation while enhancing mindfulness and reducing stress.

Yoga: A practice originating from ancient India, yoga combines physical postures (asanas), breath control (pranayama), and meditation. It improves strength, flexibility, and balance while promoting mental clarity and stress relief.

Qi Gong: Qi Gong is a Chinese practice that involves gentle movements, coordinated breathing, and meditation. It focuses on cultivating and balancing the body's vital energy (qi) while calming the mind and enhancing overall well-being.

Walking Meditation: This practice involves walking slowly and mindfully, paying attention to each step, breath, and the sensations in the body. Walking meditation can be performed indoors or outdoors and is an excellent way to combine physical activity with mindfulness.

Mindful Running: Mindful running involves being fully present and aware while running. It includes paying attention to the breath, body sensations, and the environment. This approach helps runners connect with their bodies, reduce stress, and enhance the joy of running.

Swimming Meditation: Swimming can be transformed into a meditative practice by focusing on the sensations of water, breath, and movement. With each stroke and breath, one can cultivate mindfulness and a sense of relaxation and flow.

Aikido: Aikido is a Japanese martial art that emphasizes blending with an opponent's energy rather than opposing it directly. It involves fluid movements, breath control, and mental focus. Aikido promotes physical fitness while fostering a calm and centered mind.

Mindful Strength Training: This involves performing traditional strength training exercises like weightlifting or bodyweight exercises with a mindful and present mindset. By paying attention to the body's movements and sensations, it enhances the mind-body connection and reduces stress.

Cycling Meditation: Cycling can become a meditative practice by focusing on the rhythm of pedaling, the breath, and the scenery. It can be done outdoors or on a stationary bike, providing a peaceful and refreshing exercise experience.

Archery: Archery is a traditional practice that requires focus, precision, and control. The process of drawing the bow, aiming, and releasing the arrow demands concentration and mindfulness, making it a meditative activity.

Pilates: Pilates is a low-impact exercise method that focuses on core strength, flexibility, and body awareness. It incorporates controlled movements, proper alignment, and mindful breathing to improve physical strength and mental well-being.

Mindful Hiking: Hiking in nature can be transformed into a mindful practice. As you walk, pay attention to the sights, sounds, and sensations of the environment. Connect with nature, breathe deeply, and let go of distractions to experience a sense of peace and grounding.

Rock Climbing: Rock climbing is a physically demanding activity that requires concentration, balance, and mental focus. It challenges both the body and mind, promoting mindfulness and a sense of achievement.

Martial Arts: Various martial arts disciplines, such as Karate, Kung Fu, and Judo, can be practiced in a Zen-like manner. These arts involve disciplined movements, breath control, and mental concentration, fostering self-awareness and inner calm.

Stand-up Paddleboarding (SUP): SUP combines paddling with standing on a large board in water, providing a unique full-body workout. It requires balance, core strength, and focus on the present moment while enjoying the peacefulness of being on the water.

Dance Meditation: Dance can be a powerful form of meditation when performed with conscious awareness and a focus on the body's movements and sensations. Dancing mindfully allows for self-expression, stress release, and a connection between body and mind.

Mindful Stretching: Stretching exercises, such as gentle yoga stretches or mindful static stretches, can be practiced with focused attention on the body and breath. It promotes flexibility, relaxation, and an increased sense of body awareness.

Kayaking Meditation: Kayaking in calm waters can be a serene and contemplative experience. Paddling with mindfulness, observing the rhythm of the strokes, and being present in the natural surroundings contribute to a meditative state.

Golf: Golf can be approached as a Zen Exercising activity by emphasizing mindfulness and being fully present during each swing. Focusing on the breath, body alignment, and the connection between mind and body can enhance the enjoyment and effectiveness of the game.

Trampoline Meditation: Jumping on a trampoline can be a fun and mindful exercise. By paying attention to the body's movements, the sensation of bouncing, and the breath, it can become a playful and meditative experience.

Remember, Zen Exercising is not limited to these exercises alone. The essence lies in combining any physical activity with mindfulness, presence, and self-awareness to create a harmonious integration of body and mind.

10 Ways to Practice Parkour in your Backyard or Local Park


Parkour is an unusual sport/activity, but just because it is unusual doesn't mean that your Average Joe couldn't practice it and eventually get good at it.

Here are 10 Exercises for Parkour Training that people can do in their backyard or local public park. For fun and/or for exercise. If after a while you feel confident about your skills you might join a club/group of people that practice parkour together.

Remember, safety is paramount when practicing parkour. Start with basic movements and progress gradually as you gain skill and confidence. Always ensure the environment is suitable and free of hazards before attempting any advanced parkour techniques.

  1. Precision Jumps: Set up markers or objects of varying distances and heights to practice precise jumping and landing techniques.

  2. Vaults: Use sturdy objects like benches, picnic tables, or low walls to practice different types of vaults, such as the lazy vault, speed vault, or kong vault.

  3. Wall Runs: Find a sturdy wall or fence and practice running towards it, planting one foot on the wall, and pushing off to gain height or distance.

  4. Tic-Tacs: Look for walls or structures with angles and practice using them to redirect your momentum by jumping off one surface and pushing off to reach another.

  5. Balance Training: Set up a balance beam or use fallen tree branches in your backyard to work on improving your balance and stability.

  6. Precision Landings: Find elevated surfaces like walls, railings, or ledges of different heights and practice landing on them with control and accuracy.

  7. Cat Leaps: Look for gaps between structures or objects and practice jumping and landing with both hands on the edge, pulling yourself up to simulate a cat-like movement.

  8. Quadrupedal Movement: Incorporate animal-like movements such as crawling, climbing, and jumping on all fours to improve agility and body coordination.

  9. Plyometric Exercises: Incorporate explosive movements like box jumps, tuck jumps, or burpees to enhance your power and overall athleticism.

  10. Conditioning Drills: Perform conditioning exercises like sprints, push-ups, pull-ups, and squats to improve your overall strength and endurance, which are essential for parkour.


What is Powerlifting?

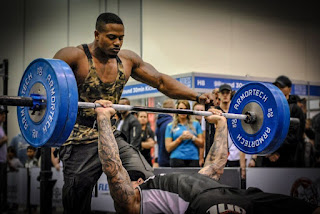
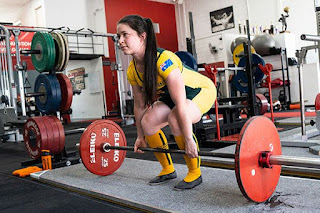
Powerlifting is a Competitive Weightlifting Sport that focuses on three main lifts. Historically these lifts evolved from a variety of strongman lifts known as "Odd Lifts", but later became standardized as the sport of Powerlifting evolved and became standardized to three main lifts:

  1. The Squat
  2. The Bench Press
  3. The Deadlift

Athletes competing in Powerlifting have the goal to lift as much weight as possible during each lift, which themselves are each compound movement requiring multiple muscle groups and are therefore challenging to do. The maximum amount of weight lifted for each of the three lifts is added together giving the athlete their total in points. Whomever scores the overall highest total is the winner of the competition.

Thus an athlete could potentially score 2nd or 3rd in all three categories, but so long as they score more points than the other competitors then they are the winner.

Competitors are divided into groups based upon their gender, weight and height, thus keeping the competition at a level playing field.

The precise rules can also vary on the organization, with the primary difference often being whether competitors must compete while "equipped or raw". Equipped means they are competing while wearing reinforced clothing such as knee wraps, back braces, bench press shirts, and powerlifting singlets, which are made of very thick reinforced polyester or Lycra. They aren't comfortable, but they give the lifters a tiny advantage over people not wearing them. Raw lifters aren't allowed to wear any such clothing or aids.

Ignoring such aids, the athletes need to focus on the quality of their form. Failure to execute the lifts using proper form and technique can result in serious injuries. So pay attention, it is very important that you learn how to do these lifts properly so you can avoid injury.

It is also highly recommended that you do these exercises with a spotter in case you get into trouble.

The Squat

Rack a barbell at the correct height for your stature and load up with the required weight that will provide a challenge, but if you're just starting out try to make the challenge relatively low.

When performing the squat, ensure that the barbell is located high up on the back of your shoulders, but below your neck.  Make sure it’s not resting on your neck because that much weight on your neck/spine could result in a serious injury.

When you un-rack the barbell you want to squat down while keeping your chest up, back straight and face forward until your hamstrings are parallel to the floor.  Do this in a slow and controlled way to avoid injury. You also want to be certain that you reach parallel, which is important in a competition because otherwise you just wasted all of that effort and it won't count unless it is parallel.

When returning to a standing position you want to power up quickly and lock your hips to finish.

The Bench Press

Using a competition bench press, you first rack your bar and load with the required weight.  Place your back on the bench and your eyes directly beneath the bar.

Keep your feet flat on the floor, unrack the bar and keeping it close to you, slowly lower the bar until it reaches your chest.  Then push back up to the top position and rerack your bar.

It sounds easy, but is harder than it looks because it uses multiple muscle groups to complete the motions.

You definitely want a spotter when practicing the Bench Press.

The Deadlift

Start by loading up a barbell which is located on the floor.

Keep the bar close to your feet, bend at the waist and grab the bar with both hands, keeping them shoulder width apart.

With your back straight, chest up and face forward, slowly stand up keeping the bar close to your shins.

Lock your hips (push them forward) as you reach the top of the movement – this is important in a competition because otherwise you won't be considered to have finished the lift.

Note

You don't have to compete to get into Powerlifting. Some people do Powerlifting just as a way to stay fit or gain muscle. Some people also just like the challenge and want to set goals to see how much they can lift.

A Beginner's Guide to Clout Archery

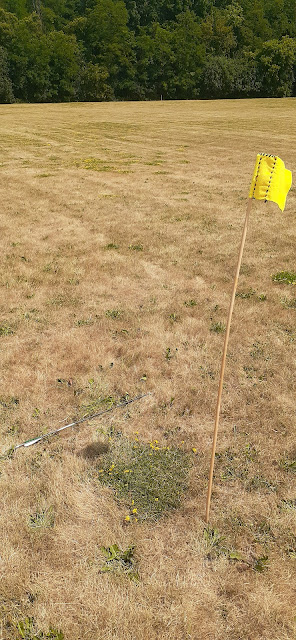
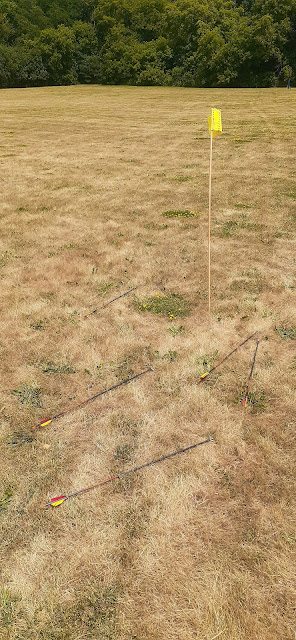
Look closely and you'll spot the arrows close to the flag pole shown in the photos on the right.

So what's the big deal?

Well, the flag is approx. 70 yards (210 feet) away from where the archery student was standing... And this was only their 5th archery lesson.

Oh and it was a tad windy that day.

That's why such results are worth taking photos of.

So what is Clout Archery?

Clout Archery is a long distance sport wherein archers compete to see who can get their arrows closest to the flag pole, which is generally placed really far away.

Usually 140 to 180 yards away, which are the competitive distances for Clout Archery.

However since the Toronto Archery Range is only 140 yards long (and lots of trees behind that) we have to use a shorter distance which is still challenging for a beginner, but also surprisingly a lot of fun.

Getting a cluster of arrows to land near the flag pole is also very challenging, even for experienced archers who are used to getting their arrows in clusters at shorter distances.

If you look closely at the photos on the right you will note that some of the arrows are touching or almost touching. That is some very good consistency for a beginner archer.

This isn't unheard of for my archery students however. I have periodically had students hit the flag pole or the flag itself at distances of 80 yards, 90 yards or more.

Getting to the point that you can do Clout Archery with this degree of accuracy isn't for beginners really. I generally only teach this to my archery students who sign up for 5 or more archery lessons.

When students sign up for 5 archery lessons they generally (I will sometimes customize the lessons for the needs of the student) get the following:

Lesson 1: Safety Lecture, Eye Test, Lecture on How to Aim Traditionally, Lecture on Proper Form, Field Archery Practice.

Lesson 2: Target Archery Practice, Lecture on Arrowheads.

Lesson 3: Long Distance Field Archery Practice, Lecture on Arrow Spine.

Lesson 4: Target Archery Practice, Lecture on How to Aim using Gap Shooting, Moving Target Practice.

Lesson 5: Clout Archery or Gap Shooting Field Archery (varies on the student).

Thus it really depends upon the student. Some students are more into learning Gap Shooting and others are more interested in long distance shooting.

Note - When someone signs up for 10 or more lessons I don't really have to choose so much. I will just teach them both, but I will still be customizing the lessons to the student's needs or interests.

Clout Archery Tips

Because the archer will usually have to aim at the sky in order to get their arrows to go that far you need to come up with a system for how to aim at the same spot on the sky.

Don't aim at clouds. They move. Instead you need to measure on the sky where you want to aim. I teach several different techniques for how to measure and aim at the sky so that students can choose which method works best for them.

Proper Form! If you don't know how to properly perform a shot then you should either get archery lessons or buy a book on the subject (I recommend "Precision Archery" by Steve Ruis & Claudia Stevenson).

And if you're in Toronto or the GTA you have no excuse not to get archery lessons from a dedicated professional like myself who teaches multiple different styles of archery and different archery sports like Clout Archery.

Browse the links below to learn more. Happy Shooting!

See Also

The Benefits of Clout Archery

Archery Lessons in Toronto


Horse Riding as Exercise

How many calories do you burn while riding a horse?

Well, the horse is doing most of the work... But the rider isn't exactly still either.

According to our sources - horseback riding calculators and magazines like Canadian Thoroughbred Magazine - an individual rider burns approximately 250 to 400 calories on average (varies on the rider's weight and level of fitness). This happens when riding at a slow speed. On the other hand, speedier activities like galloping tend to burn 550 to 700 calories per hour, but the horse can't really gallop for a full hour. It needs to stop and rest. You would have to gallop on a horse for as long as it can gallop, switch horses and repeat, and keep doing that for an hour. So you can't really gallop on a horse for a full hour.

All this goes to prove is the horse riding is great exercise.

It is also expensive. The vet bills alone for owning a horse is over $11,000 CDN per year.

But there is a solution!

If you really want to learn how to ride a horse (and get exercise) there are a variety of places that offer horse riding lessons or "trail riding days" near Toronto.

Places like:

  • Claireville Ranch
  • Caledon Equestrian School
  • Creditview Stables
  • Meadowlarke Stables
  • Benchmark Equestrian
  • Raynham Stables
  • Briarwood Farms
  • Quarter Valley Stables
  • York Equestrian
  • Forward Riding School
  • Well Dressed Equestrian
  • Pathways on Pleasure Valley
  • Silvercreek Riding School
  • Ajax Riding Academy
  • Stoneridge Farm

And more... Seriously. There's a tonne of them, and they cater to a variety of needs so you just need to browse if you want to find a fun place to ride horses (and get exercise). You want to find the kind of place that is right for you, in terms of the financial cost of riding lessons or "trail rides" and what you are looking for. Trail rides for example are typically less expensive, but they're not really teaching you anything. You are just expected to ride the horse as it follows the trail and you don't do anything else except ride (which is great if your primary goals are exercise and fresh air).


Not everyone wants trail rides however. Some people might want English-style riding lessons, or Western-style riding lessons. Some people might even be interested in show jumping or horse racing, in which case they would need to find specialized lessons for that sort of thing.


Some people might even want to learn how to ride bareback... on a beach. And while that sounds like a fantasy there are technically places that offer that. They're called resorts that have their own private beach and have horse riding lessons available for guests at the resort. Guaranteed you are paying a premium for that extra bit.

But if you do get into horse riding there are a number of physical health benefits for doing so, and a few mental ones too.

The benefits of horse riding include:

  • Strengthens core muscles. Core muscles are the ones that support your torso and help keep you upright.
  • Works your leg muscles.
  • Your arms and shoulder muscles get a workout.
  • Boosts heart health.
  • Improves balance and coordination.
  • Lowers stress.
  • Helps develop problem-solving skills.
  • Increases your bond with animals. 

So... Are you still procrastinating? You're not getting any younger. Go find some horse riding lessons today! It makes no difference to me. I mostly teach archery lessons. I just happen to like horses.

If it was up to me I would opt for the trail riding because I have already had horse riding lessons when I was younger. Getting riding lessons and repeating a lot of the stuff I already know is useless to me. I just want to go riding.

But I do foresee getting my son riding lessons, and possibly my wife if I can get her to agree to it, in which case that list of places above could be handy.

Fix your Bicycle for Fun and Exercise (and Profit)

So bicycling is already an exercise, but so is fixing your bicycle. Or better yet, learn how to fix other people's bicycles and you can "exercise and get paid for it" on a regular basis.

Learning how to fix your own bicycle is certainly a good way to save money. Professional bicycle mechanics in Canada typically charge $60 per hour + the cost of parts.

See How much should a Canadian Bicycle Mechanic be charging for repairs?

So yes, you can definitely save money and get exercise while fixing bicycles.


But How Do You Learn How To Fix Bicycles?

Well, there are a number of methods of learning how to fix bicycles. Here is a list of ways:

  1. Take a bicycle mechanic training course from a professional bicycle mechanic instructor. The one I recommend is Smokey from the Quadra Bicycle Mechanic School. Smokey used to teach the BAM class in Toronto, but later moved his teaching to the island of Quadra in British Columbia. Before I became a personal trainer / sports trainer, my one time goal was to open a bicycle shop and become a full time bicycle mechanic. Smokey is the guy who trained me, and even though I never opened my bicycle shop, I still credit him with me changing my life around and starting my own personal training business.
  2. Learn from a book: The book I recommend is "Barnett's Bicycle Repair Manual". If you do a Google search you can probably find a PDF copy of it. Otherwise it usually costs about $29.99. I have a copy of the book that I got when I took the BAM program in 2009.
  3. Learn from a website: Eg. The Bicycle Mechanic, for example, is a website I started in 2009 around the time I took the BAM program here in Toronto. I was basically learning everything I could during the BAM class from Smokey, plus the Barnett manual, and converting the things I learned into a website that other people could read and use.
  4. Learn from various YouTube channels. There is no one YouTube channel I am going to recommend on this subject. Many of them are good. They range from celebrities like James May (from "The Grand Tour" and "Top Gear") doing bicycle builds and maintenance videos to people who are not famous, but are professional bicycle mechanics. I have included one such video from James May below in which he does some "boring bicycle maintenance".
  5. DO ALL OF THE ABOVE. Watch the videos on YouTube, read websites like The Bicycle Mechanic, get a copy of Barnett's manual, or take a bicycle mechanic training course. If you're absolutely serious about getting really good at fixing bicycles then just do everything.


And once you learn how to fix bicycles then you can potentially earn money (and get more exercise) while doing an activity you enjoy. (Well, it isn't always enjoyable. Sometimes it is hard, but anything that require exercise during the process usually means there is a work element to it.)

What about myself?

Speaking for myself I learned how to fix bicycles from my dad and my best friend Jonathan (who was practically a brother to me) when we were growing up. When I was older and serious about learning more about how to fix bicycles I took the BAM course, I got the Barnett manual, I made the website myself, and I have even considered making my own bicycle mechanic YouTube videos. With the exception of the bicycle mechanic training course from Smokey I did everything else myself.

Same thing goes years ago when I got more serious about making my own bows. I took a course from a bowyer here in Toronto and I purchased 5 books on the subject of bow making, so now I can make my own flatbows, pyramid bows, longbows and more.

If you really want to learn something then hire someone to teach you. It is the whole premise of my sports training business. I teach archery, boxing, swimming and ice skating. Skills that people really need an instructor for if they want to learn how to do it properly.

Easy Ways to Exercise in Front of Your Screen

Whether you’re someone who uses phone apps to simplify your schedule, a parent who juggles tablet time with your kids, or newly working-from-home, modern life has much of our daily life centered around a computer screen. Finding ways to stay active while at home can be hard but with the right posture and practices getting that exercise at home is easier than you think. In fact, the best adjustments you can make will be while sitting right in front of your screen!

Remember to always consult your doctor before introducing any new exercises to your routine or if you’re experiencing any pain or discomfort. All of the exercises and recommendations mentioned here should be low-effort and easy to modify, so you shouldn’t experience any pain while performing them. If you do, stop immediately and seek the opinion of a medical professional.

Proper Posture

First things first, consider how you’re sitting right now. If you’re sitting at a desk, how’s your posture? Are your shoulders rolled forward or are they situated over your hips? Is your back hunched or are you sitting up straight? If you’re using your phone and standing or sitting in a recliner, is your neck crooked or are you giving it enough support?

These kinds of positions can cause tension to accumulate in your body throughout the day, especially if you spend long hours sitting in one spot. Take short breaks every hour or so to think about how you’re positioned and do some of these quick exercises to give your muscles a break and reset your posture.

Neck and Shoulders

Stretching your neck and shoulder muscles will help relieve tension that can cause headaches. Start by very gently dropping your chin down and rolling your head from shoulder to shoulder, keeping your chin against your chest. Try and keep your shoulders relaxed and down while you do this. Don’t over-extend or roll your head past the half-circle of your shoulders otherwise, you could put too much strain on your cervical spine.

Sit up straight and shrug your shoulders up and down, extending the top of your shoulders straight up towards your ears. Pull your shoulder blades together behind your back before relaxing them again.

Eyes

Your eyes are a muscle just like your neck and your shoulders, so make sure to give them a stretch when you take a break too. Spend time focusing on something other than a screen for at least five minutes every hour. Try focusing your eyes together, first to the left and then the right. Then up and down, and finally in a clockwise circle and then a counterclockwise circle.

Wrists

When you think about posture your hands might not be the first thing that comes to mind, but it’s important to remember to stretch your wrists too if you use the computer a lot. Loosen your wrists and shake your hands out very lightly to release the tension. Raise your arms, lifting your hands so your palms are facing each other, and gently press your palms together. Press and release several times to give your wrists a light stretch.

Picking up the Pace

Stretching and maintaining posture will help with long-term wellness, but you can also get your heart rate going in front of your desk or while sitting on the couch. Taking cardio breaks will keep your blood circulating and the exercise could even help with productivity. The best part is you can do most of these while waiting for a screen to load, listening in on a conference call, or even while watching a favourite movie again and again.

Seated Exercise

While sitting upright, lift one leg until it is parallel with the floor and hold it for ten seconds before gently lowering it back down. Then do the same with the other leg. You can increase the number of repetitions as you build your strength, and if you need a challenge you can even add an ankle weight or loop a bag on your foot for some added heft.

Doing this same exercise but with no weights, a bent knee, and a little extra speed will help get your heart rate going. Make sure to keep your spine straight so you’re targeting your abdominal and leg muscles and not straining your back.

Standing Exercise

Using the edge of a desk or the back of a chair (not a rolling one!) to brace yourself, you can do a standing push-up to give your upper body a workout. Put your arms about shoulder-width apart and move your feet back until you’re at an incline, palms firmly on the desk. Breathe out and gently lower yourself as far as you can towards the desk before pushing yourself back up. Don’t lock your elbows or lower yourself further than is comfortable--you don’t want any unnecessary strain on your joints.

The “invisible” jump rope is a great low-impact cardio exercise since all you’ll need is yourself and a small space to be able to run in place. Imagine that you’re holding a jump rope--yes, this is also a thought exercise--and skip rope. It’s that simple. Try alternating footwork, jumping on only your left or only your right foot, or changing your pace. However you do it, it’ll get you up and out of your chair and you don’t have to worry about accidentally flinging a jump rope at your computer.

The Extras

Some gadgets that can encourage you to be active in front of your screen and that may genuinely help, like standing desks, pedal machines, and yoga balls. But before you throw money at a solution you’re not sure you’ll like, try making some of these simple adjustments first. The hardest part of starting a routine is making something a habit, so the most important thing to do is stick to it. You don’t have to do it perfectly every time, you just have to do it.


Hedge Mazes for Exercise

Want an unusual way to get exercise?

Take a group of friends to a hedge maze and have a race to see who can get to the middle first - and part 2, who can get out first.

I took the following photos on September 1st. I took the photos on the way in, and then my wife and I had a race on the way out.

But in theory you could do it multiple times, in and out, until everyone is tired and wants to do something else.

The place we went to also sells homemade ice cream, so not exactly the healthiest post-maze option. But certainly tasty.


Underwater Archery

TORONTO ARCHERY LESSONS

As unusual exercises and bizarre sports go, Underwater Archery should certainly rank up there.

It is certainly feasibly to do, but the range a person can achieve accuracy, the speed of the arrow, and even visibility is significantly reduced.

The problem is that the density of the water (as opposed to air) slows the arrows down significantly, so the distance a person can shoot is immediately hampered during the release, and the arrow slows quickly.

The usable range would be similar or less than a speargun or harpoon gun, which have an operational range of about 10 meters.

So do people compete at Underwater Archery?

Nope, not yet.

Could someone organize an Underwater Archery tournament? Probably someone could do it as a joke. It would be more amusing than anything else.

It doesn't make sense for fishing either. Bowfishing is easier to do from the surface when you are shooting at fish that are in relatively shallow water, that way the arrows are not slowed down too much upon impact.

As demonstrated below Underwater Archery is mostly for the purposes of photography.


How I used personal training to help my infant son roll, crawl and walk faster, Part Two

PART TWO

By Charles Moffat, Toronto Personal Trainer

 April 25th 2018.

It has been 6 months since I wrote PART ONE of this series of posts. My son Richard is now 10 months old and he can now roll over with ease, is crawling, cruising and even walking small amounts independently.

Last time we covered the following topics:
  1. Tummy Time
  2. Assisted Rolling
  3. Assisting Sitting Up / Assisted Sit Ups
  4. Assisted Standing
  5. Assisted Squats
All of which gave Richard the ability to roll over sooner than other babies would normally be able to (on average), to be able to sit up on his own sooner, stand up, squat down to pick things up, and do a variety of tasks.

The normal ages for doing the various activities are as follows:

The normal ages for rolling over, sitting up, crawling, standing up, and walking are as follows:

Rolling Over - 4 to 6 Months
Sitting Up - 4 to 8 Months
Crawling - 7 to 10 Months
Standing Up - 9 to 12 Months
Walking - 9 to 15 Months
Now with Richard being 10 months old, he has long since mastered rolling over, sitting up, crawling, standing up, cruising (walking by holding on to things), and is walking independently short distances. He has also learned how to walk up and down stairs, with assistance.

Today we are going to talk about other topics, including:
  1. Assisted Walking, Two Hands
  2. Assisted Walking, One Hand
  3. Assisted Stairs, Two Hands vs One Hand
  4. Independent Walking
  5. Letting Go, Letting Them Fall
#1. Assisted Walking, Two Hands

Walk around your home with your baby for about 5 minutes at a time, holding your baby's hands or fingers by both hands.

I say 5 minutes at a time because doing this for an extended period can become painful for your back if you are constantly bending over.

Note - While there are gadgets for this, such as Jolly Jumpers, Walkers, etc - those are useful, but they will never replace the physical action of walking around your home, local park, library, etc for a few minutes at a time to build of the muscles in your baby's legs. The Jolly Jumper for example does allow your baby to stay suspended in the air, with no fear of falling, but unfortunately in practice is often more like a swing than a walking device. Various walking devices are designed to be pushed around while the baby holds the handlebars, but unfortunately babies don't inherently know they are supposed to do that and so with Richard (for example) he is more likely to just flip the walker over and play with it.

Update, October 2018 - Richard didn't really start using the walker until 14 months, roughly 3 months after he had mastered independent walking.

#2. Assisted Walking, One Hand

Walking with two helping hands is really because your baby hasn't yet learned how to balance themselves and will fall over easily. Walking with one hand means that they have already learned a degree of balance, and is now progressing to being able to walk independently - but for safety reasons and a little added balance the single helping hand is there so your baby has someone to cling to if need be and should a fall happen.

#3. Assisted Stairs, Two Hands vs One Hand

I started Richard going up and down stairs at a very early age, at the same time we were doing assisted walking. If we were doing assisted walking and came to stairs, the natural thing was to simply help him walk up the stairs - something he seems to find hilarious.

The same rules apply, but I do recommend a firm grip on your baby's hands and lots of patience as babies like to take their time on the stairs.

Walking up and down stairs with one hand helping is something Richard now does regularly. Every time we go outside is another chance for him to use the stairs. Thus my recommendation is to see every staircase as an opportunity for your baby to practice walking up/down stairs.

Update, October 2018 - Richard can now climb stairs independently, but for safety reasons I usually hold 1 hand just to be safe.

#4. Independent Walking

There will be times when your baby shoos your hand away and just wants to walk on their own. Just let them do it on their own. Be there in case they fall and keep constant supervision.

With Richard he seems to be magnetically drawn towards cars and traffic, so I am constantly putting him in the middle of the park, far from traffic and then herding him like a collie herds sheep in an effort to keep him away from cars.

With the independent walking I also keep track of the number of steps he does, as a way of record keeping his progress. When he sets a new record for the number of steps, I make a note of it and tell the wife "Richard walked 17 steps today. New record!"

Thus every day you want to allow your baby to play in some sort of safe play area - could be the living room floor, a large play pen, the local park - and just let them walk around on the grass / floor for 30 to 60 minutes every day as they get better at independent walking.

Having a large play pen or play area in your home is also handy.

#5. Letting Go, Letting Them Fall

For a parent learning to let go and let your child fall can be a bit challenging, but it is something you need to do. Your baby needs to learn how to fall, how to land, and how to get back up again and keep doing it.

Learning how to fall safely, take the hit, and get back up is an important skill for babies to learn.

Update, October 2018 - Richard recently discovered he can spin himself in circles and make himself dizzy, and then fall down. He thinks it is hilarious. Clearly falling and getting back up is not a problem for him.

For the parent your goal needs to be there to observe and not to interfere. The only times you should be interfering is when there is danger to your baby, which should be mitigated by simply picking safe places for your baby to practice walking.

eg. A large football field or baseball field is pretty good. Lots of grass to soften falls and the distance to any danger (eg. traffic) is significantly further away and hopefully blocked by fences.


Update, December 2018

Richard is 17.5 months old now and walks independently all the time, except when on a sidewalk near traffic and near other possible dangers (rivers, lakes, pools, etc). He can go up stairs independently, but we usually hold his hand for safety reasons.

He has also:

  • Mastered the buttons on automatic doors.
  • Figured out the buttons on elevators.
  • Figured out escalators.
  • Learned to steal remote controls and cellphones/tablets and press the buttons.
  • Climb up stairs for a slide, sit down and slide down it.
  • Push chairs and other obstacles out of his way.
  • Mastered clapping, high fives, patty-cake, peekaboo, hiding under blankets, kicking things...
  • Crawl underneath furniture or between gaps sideways to escape.
  • Climb up on to furniture (to steal the TV remote).
  • Can spin to make himself dizzy.
  • Figured out this new thing called jumping.
  • He can move surprisingly fast, not quite running yet, but soon enough.

Honestly, if you take your eyes off of him for a few seconds he can run off in a different direction and you have to chase him. He loves to explore.

Thus physically he is now highly capable, so my big challenge these days is to supervise his activities and teach him new things. Every day it is something new.

How I used personal training to help my infant son roll, crawl and walk faster, Part One

By Charles Moffat, Toronto Personal Trainer.

Okay so my infant son Richard is roughly 3 months and 2 weeks old, and he is already rolling over from his back to his belly, and vice versa. He did his first complete roll yesterday and did several more today.

Now to be clear, being able to roll over by himself is a huge stepping stone for a baby. The normal ages for rolling over, sitting up, crawling, standing up, and walking are as follows:
Rolling Over - 4 to 6 Months
Sitting Up - 4 to 8 Months
Crawling - 7 to 10 Months
Standing Up - 9 to 12 Months
Walking - 9 to 15 Months
Call me impatient if you wish, but I have become determined to help my son reach the various milestones slightly faster than other babies. (For context he said "Daddy" back on August 31st, when he was just 2 months and 1 week old - and he was 2 weeks early popping out of his momma, so clearly he is also impatient to do everything in a hurry.)

Every day I get my son exercising. But the exercises he does differ from what most parents normally do.

#1. Tummy Time

Usually such exercising is referred to as "Tummy Time", which is included in what he does. Tummy Time is typically laying the baby on his or her tummy so they can practice lifting their head up.

Tummy Time is important for building neck and upper back muscles, in addition to arm muscles, leg muscles, abdominal muscles - all muscles your baby needs to start building.

Tummy Time is an exercise that all babies should be doing, every day. So it is strongly recommended parents take the time to have their babies do 10 to 30 minutes of Tummy Time per day.

#2. Assisted Rolling

In addition to Tummy Time I also help my son to roll over - to the point that he can now roll over onto his side - and from his side to his belly - all by himself.

We accomplished this by doing the following:
  • Assisted rolling by helping him move his arms and legs into the correct positions for rolling over and then helping him push himself onto his side, and eventually on to his belly.
  • Laying him on his side so he can practice rolling on to his back or towards his belly, unassited
Now that he can roll himself under his own power he is less vulnerable to SIDS (Sudden Infant Death Syndrome). A common cause of SIDS is a baby suffocating on something because they were unable to roll away from the object they were suffocating on. Even being able to perform a half-roll on to their side could end up saving their life.

#3. Assisted Sitting Up and Assisted Sit Ups

This I accomplish by placing him in a sitting position and supporting his back and chest with one hand. As he gets better at it however I have started removing the hand supporting his chest, and even switching to having both hands holding his wrists instead of his torso - this way he still gets support if he needs it, for safety reasons, but otherwise is practicing holding himself upright in a sitting position.

I find you have to kind of steer him using his wrists and arms because his lack of balance will cause him to leave forward or to the sides more often.

The second part of this is holding his hands and helping him to perform a basic Sit Up. He starts from a laying position, holding his wrists I help him into a sitting position - maintain that sitting position - and then help lower him back down into a laying position. I repeat the Sit Ups 10 times before giving him a break.

#4. Assisted Standing

Using my hands under his armpits to support him, I lift my son into a standing position. I then reduce the amount of pressure I am using to support him, forcing him to exercise his leg muscles in order to maintain standing.

Doing this exercise every day, I find it allows my son to build stronger legs so that he is now able to stand for longer periods with very minimal support (mostly for balance and safety purposes) from myself.

Sometimes I will also help him by supporting his hands instead of his arm pits, so he is more under his own power.

#5. Assisted Squats

Since his legs are getting stronger every day, I have also started helping him to do squats. Squats builds his leg muscles even faster than standing does. The method is similar to the assisted standing above, but I reduce the amount of pressure I use to support him so that he is forced to either stand on his own or is reduced to a squatting position and then he has to use his own power to stand back up again.

He hasn't reached the point like the baby below has with the squatting and lifting weights, but nevertheless.


 Your End Goals

The ultimate goal of all of these exercises is to improve the survivability and strength of your baby.

If your baby can roll over by themselves that is a very important step, but being able to sit up independently, crawl away from danger, or even stand and walk away from danger - those seem like important skills to me.

As my son gets older I will also be making sure he learns how to swim and a variety of other useful skills.

Doing all of this in a supervised manner is safer in my opinion.

Doing the things mentioned above may seem like "no brainers" to some people, but I am also applying personal training concepts to his exercises, things like:
  1. Repetition - He does every exercise 10 times or more, or for at least 10 minutes.
  2. Exercising Daily - He exercises every day, even when Papa is tired or busy we still make time to do the exercises.
  3. Do Every Exercise - We don't skip any exercises. 10+ minutes of Tummy Time, 10 Rolls, 10 Minutes of Sitting, 10 Sit Ups, 10 Minutes Standing, 10 Squats. Total time - About 35-45 minutes.
  4. Break Times - So he doesn't get exhausted.
  5. No Exercising on a Full Tummy - Want to see the baby spit up? No? Then wait at least 30 minutes after feeding before doing any exercises.
  6. Nap times are also good, not just for baby, but for everyone.

As your child grows they are going to be exercising constantly. Remember to hydrate and feed them regularly. Sleep. Nap. Rest breaks.

Avoid too much TV, computers and cellphones. If it feels like they are watching screen too often, it is time to go outside.

Remember to have fun outdoors!

Don't Expect This To Happen

How to use a Rowing Machine Safely and Efficiently

Guest Post by Scott Murphy.

After years of being unnoticed, it’s now time for that weird exercise machine collecting dust in your gym corner to take the stage. The rowing machine, or ergometer, has become increasingly popular recently, and for good reason, too. It has been proven that an hour on the machine can burn up to 800 calories. Also, since it puts almost all the muscles in your body to work, using the rowing machine is of the most effective workouts.However, it takes a bit more knowledge and skill to use this piece of equipment.

When used properly, rowing machines can prove to be powerful workout tools, strengthening your core, legs, arm, shoulder, and back muscles. But, effective workouts can only happen when you know how to use your resources properly. So here are a few tips to help you use the rowing machine safely and efficiently:

1) Start with your legs.

The common misconception with most people is that rowing is all about using your arm muscles, but it’s actually about 60 percent legs, 20 percent core, and 20 percent follow through with the arms and shoulders. As you push off the footplate, concentrate and start with your leg muscles, really using your hamstrings.

2) Go skin-tight.

If you’re someone who’s acquainted with the sport of rowing, then you must know about the spandex unisuits rowers always wear. These skin-tight outfits aren’t worn merely to give you a chance to put your toned body on full display. The form-fitting clothes are meant to keep you safe while performing the exercise. Loose shorts are something to watch out while you’re on the move since they have a tendency to get caught in the slide.

3) Get your feet locked in.

Before you begin rowing, make it a habit to lock your feet by strapping them into the pads on the machine. Pull the straps across the top of your foot, tight enough so your feet will not slide around on the footplate.

4) Don’t row only with your arms.

Pulling the handle with only the strength of your arms will cause serious injury to your body.

Rowing requires 60 percent of your power to come from pushing with the legs, 20 percent from using the core, and another 20 percent from pulling with the arms. Keep in mind how important it is in each stroke to use the power of your legs as you push against the panel or foot stretcher where your feet are strapped in.

5) Keep your shoulders working.

In the finish, keep your shoulder blades together and focus on how your core muscles are helping you maintain your body in that slight angle. A word of caution is to stop rowing if your shoulders begin to hurt. Listen to your body and don’t overexert yourself.

6) Beware of blisters.

If you don’t want any blisters and callouses on your hands, keep a relaxed grip on the handle.

Many beginners tense up during the exercise and grip the handle too tightly, leading to discomfort and an inefficient use of energy. Taping can also help prevent and treat these injuries.

7) Don’t push the resistance.

Indoor rowing machines are what rowers use to help them prepare for the real boat race in the water. While your erg’s fan can be set at a higher resistance, most professional rowers stick to the lower settings. Keeping the fan setting between 2 and 3 replicates actual water resistance.

Very few rowers train at a fan setting higher than 4 because it runs the risk of injury. So, don’t get cocky and adjust the settings at a level your body can’t handle.

Back when Jogging was Weird

Back in the 1950s and earlier jogging was something only soldiers, athletes and weirdos did. Although to be fair, the whole idea of "exercising for the sake of exercising" (or fitness / health reasons) was considered weird back then too.

And to shine a light on this check out the video below I watched yesterday which chronicles the rise of jogging as an exercise activity. It shows how jogging was once considered an oddity.


And to be fair, the whole modern idea of exercising is really a 20th century invention. Prior to the last 117 years, people rarely exercised for the sake of exercising. Sure, people competed in athletic competitions, but the idea of training, practice and maintaining a constant level of exercise - even in the winter! - was considered to be a weird idea and unnecessary.

That was before the advent of professional sports and sportsmen earning an annual salary for being a professional athlete.

Before bodybuilding became a competitive sport.

Back when bicycles were called Penny Farthings, had no brakes and the only way to stop was to crash it. (And usually had mustaches they combed with beeswax.)

It would take decades for many sports to reach a pinnacle in which a person could become a professional in their chosen activity and make a decent living doing it.

Even now many Olympic athletes still have to beg money from their governments and work full time / part time jobs in order to support their athletic endeavours.

Jogging is just one of many activities that were once considered strange and unusual.

Take archery for example.

While it is generally accepted that a person must practice regularly to be good at archery, it was usually a pastime in recent centuries thanks to firearms and only a rare few people did bowhunting. During the last 100 years archery and bowhunting has seen a resurgence in popularity and people can now be:
  • Olympic Archers
  • Professional Bowhunters
  • Archery Instructors
So it is now possible to make a living doing archery in a variety of ways. Even former Olympic athletes can presumably become coaches when they retire from competing.

Making a living by jogging, well that is the stuff of:
  • Professional Marathon Runners
  • Olympic Joggers (5 KM, 10 KM, etc)
  • Personal Trainers who teach people how to jog, train for marathons, etc.
So a lot has changed. Jogging is just a prime example of how things have changed.

And much more is still waiting to be changed. I am still waiting to see a professional women's hockey league in Canada to get televised coverage on the CBC.

Women sports (and televising them) has a huge potential to grow in the 21st century. Not just in North America where professional athletes are more common, but globally.

Six Exercises for Bowhunters

So you're thinking about becoming a bowhunter eh? Or maybe you are already into bowhunting, but want to get better at it by getting a physical edge? Note: If you are looking for compound bow archery lessons in Toronto, please contact me and I can help you out.

Well, lets get started.

#1. Push-Ups, builds the arms, shoulders, pectorals, back muscles and core muscles. A good overall exercise. Also goes well with sit-ups, chin-ups, jumping jacks and other old school exercises. The great thing about old school exercises is that require almost no equipment to do and rely on body weight instead of free weights or exercise machines.

#2. Rowing Machine, this specifically targets the back muscles, which is very beneficial for archery. Gives you a steadier pull and that increases accuracy when shooting.

To make your own rowing machine it isn't difficult, you really just need a metal bar, a rope and a suitably large weight on the end of the rope. You could easily accomplish this in the garage, over a tree limb in the backyard, in the basement, etc. You don't need a fancy set up like the illustration of a rowing machine shown on the right, you could accomplish the same thing with zero woodworking skills. A wire cable over a pulley can do the same job, although I do recommend making a wooden handle for pulling with.

I saw one once which used an old bicycle wheel (minus the tire and inner tube) as the pulley, a wire cable, a wooden handle, and old weights from a weightlifting set.

#3. Rock Climbing, beneficial for any bowhunter who wants to be climbing trees and setting up a tree stand. Tree stands are sadly one of the norms of hunting these days, so few people stalk or use ground blinds. However many hunters fall out of the tree due to having a lack of a safety harness, usually preceded by a comment something akin to "I don't need no stinking safety harness!" And then they fall and hurt themselves. So why not take up rock climbing and see just how easy it is to fall and why even experienced rock climbers always wear a safety harness.

Fortunately in Toronto there are many rock climbing gyms to choose from. A quick Google search will find you a local rock climbing gym not that far from where you live. "Wow. I didn't know there was one so close!" you might exclaim. Toronto is rife with them. Even if you don't like in Toronto chances are likely you can find a rock climbing gym or a rock climbing club in your area you can join.

#4. Hiking, beneficial for those bowhunters who enjoy stalking their prey. While do this I recommend doing several things:
  • Wear the boots you would normally wear while hunting in.
  • Carry a backpack with water / snacks in it to simulate the extra weight you would be carrying while hunting. Add additional water for weight even if you don't need it.
  • Bring binoculars or a camera. If you spot a deer or smaller critter try to get as close as possible and get a photo, this is your chance to hone those stalking skills.
  • Pay attention to the plants, tracks, droppings, smells, and wind. Learning extra woodsman skills are beneficially to hunting later.
  • Practice walking quietly. Try to make a habit of it. Avoid making loud noises that scare away animals.

#5. Jogging, for endurance. Oddly endurance is a big factor for hunters of all stripes, especially if you have to carry/drag a heavy dead animal out of the woods so you can eat it later. Jogging builds your lung muscles and increases your lung capacity. It also makes your heart stronger, able to pump more blood faster, which in turn gives you more energy.

#6. Cycling, again for endurance, but also handy to get deeper into the woods faster. If your chosen site for hunting in is really far into the woods having a bicycle means you can get there faster, and relatively quietly. Make sure your bicycle is in good working order and quiet before taking it into the deep woods. Tip: A good bicycle for the woods is one with thick tires, as these can handle bumps easier and gives better traction in muddy / dirty conditions. A road bicycle with skinny tires would be comparatively more likely to break.


Gardening - A Weight Loss Exercise Plan + Diet

Gardening can be a fascinating topic for some people - or really boring to anyone who has zero interest in plants. But if you are fascinated with the idea of growing your own food, I want to propose the following Exercise Plan / Diet.

The goal essentially is to grow your own food in your backyard. This will require lots of work (exercise), careful planning, time, cooking/baking skills, and a dose of determination.

I recommend planting the following, which I have listed in order of spectrum because I think it would be nice to have a garden that is ordered by colour:

Red Beats
Radishes
Tomatoes
Raspberries (Requires more space.)
Strawberries
Mini Red Potatoes (Smaller than regular potatoes, but tastier.)
Red Peppers
Carrots
Orange Peppers
Yellow Peppers (Because it is nice to have variety.)
Sweet Corn (Requires more space.)
Green Beans
Broccoli
Peas
Lettuce (There are many different kinds of lettuce, I recommend planting 3 different kinds so you have variety.)
Watermelons (Green on the outside, red on the inside.)
Herbs (There are likewise many different herbs, such as basil, parsley, cloves, dill, etc. They are commonly used as spices, not as a main dish.)
Cucumbers
Blueberries
Purple Cabbage
Purple Cauliflower
Eggplant
Garlic
Onions
Mushrooms

I recommend against planting anything huge like squash or pumpkins, because those plants take up a lot of space. So unless you have tonnes of space, you should focus on plants that produce more food for their smaller area. This is similar to the Sweet Corn above, which does take up more space, except that pumpkins and squash take up a LOT of space. Also don't expect to be growing any huge "prize winning pumpkins" on your first try. Most likely they will be quite small. (Also who wants to eat that much pumpkin???)

I also recommend against planting white or yellow potatoes, which contain a lot of starch and starch is fattening. I includes the Mini Red Potatoes above for variety and also because they taste better.

Baked mini red potatoes are also very tasty. Just bake on a pan, add some spices and yum!


Once you've got your garden growing your next step is to eat what you've grown. Some of that may require learning some new cooking / baking skills, but honestly the internet and youtube has lots of recipes for you to explore. Make a mistake? Oh well, you will know better next time.

The end goal is that you will be eating more healthy food that you've grown yourself - which often tastes better than anything found in a store.

All that exercise from tilling, planting, weeding, harvesting means you will have shed some pounds over the course of Spring to Autumn. Once you've harvested the food at various stages during the year you will reap the benefits of eating lots of healthy vegetables - whether they be the form of salads, stews, soups, berries with yogurt, on pizza, juicing, or whatever recipes you decide to cook up with them.

The end result is if you treat your garden as both an exercise plan and a diet plan, you are guaranteed to become a healthier weight / a healthier person in the process.

I also recommend weening yourself off sugary drinks and high sugar / high cholesterol snacks. Some foods are so addictive that people will get into a habit of eating them at a specific time every day and if they do not then they get cravings for sugary things at that time of day. (This happens to me every year when I visit my parents and my mother sends me home with bags full of cookies, squares, etc - and I end up developing a sugar craving during a particular hour of the day afterwards due to snacking on them that part of the day. Fortunately I eventually run out of them and the craving is forced to go into decline.)

There are three ways to ween yourself off addictive foods:

1. Eat less of them and stop buying them, you will eventually have to stop because you run out.

2. Go cold turkey, meaning cut yourself off from them completely. This is trickier because if they're in your cupboard / freezer you either have to ignore they are there or thrown them out. Option 1 suddenly looks more appealing, yes?

3. Eat berries. Berries have natural sugars in them, so they will fulfill your craving for sugar but you are switching your addiction from one food to a different food. Other foods that are also higher in sugar are: grapes, mangos, bananas, cherries, apples, pears, kiwis and pineapple. By replacing your addiction with something healthier this is a good way to ween yourself off sugary foods and make a gradual switch towards healthier options.


Looking to sign up for archery lessons, boxing lessons, swimming lessons, ice skating lessons or personal training sessions? Start by emailing cardiotrek@gmail.com and lets talk fitness!

Followers

Popular Posts

Cardio Trek Posts